The Spectra Forms block allows you to create beautiful and functional forms without any coding knowledge for free.
It comes with a variety of pre-made templates, as well as the ability to customize your forms to your exact requirements.
In this article, you will find a complete breakdown of all the available controls and settings for forms so you can create nice-looking forms for your website.
Types of Forms
You can create any type of form with Spectra’s form block by simply adding the fields that you want. But still, we offer multiple form templates that you can use out of the box.
Here are some of these templates :
- Simple contact form: A simple contact form is a form that allows visitors to your website to contact you with their questions, feedback, or concerns. It typically includes fields for the visitor’s name, email address, and message.
- Newsletter form: A newsletter form is a form that allows visitors to your website to subscribe to your newsletter. It typically includes fields for the visitor’s name and email address.
- Suggestion form: A suggestion form is a form that allows visitors to your website to submit suggestions for improving your website. It typically includes fields for the subject of the suggestion and a brief description of the suggestion.
How to Create a Contact Form Using Spectra
We’ll assume you already have Spectra installed and activated on your website. Once completed, you can simply follow the steps below:
Adding the Spectra Forms Block
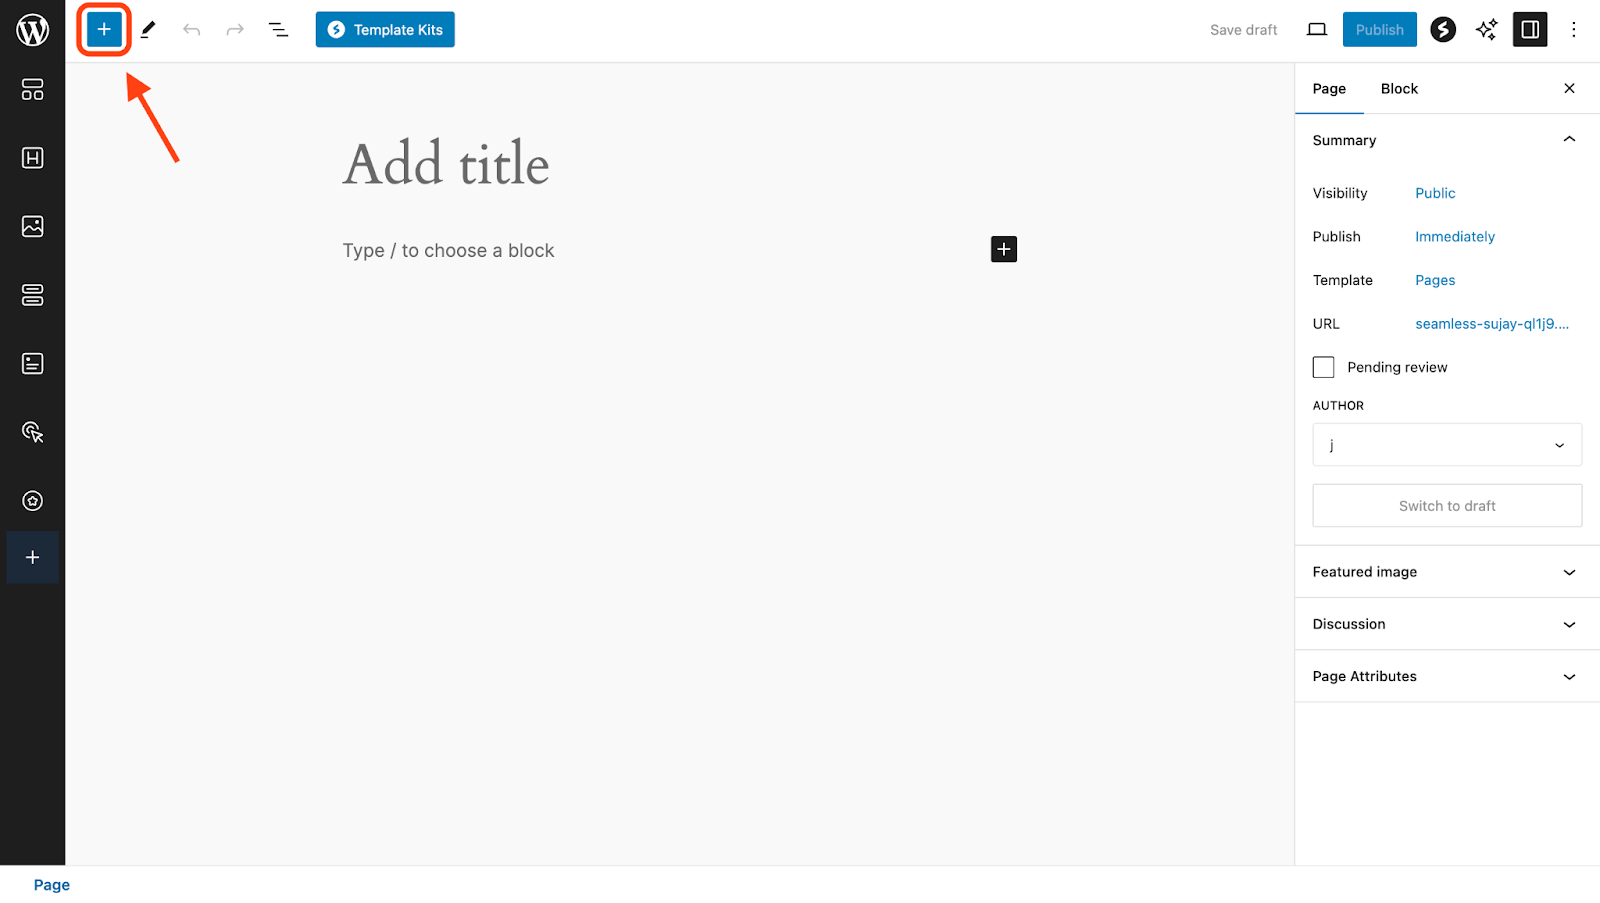
- Navigate to the page or post where you want to insert your contact form. Then, click on the + icon at the top-left of the screen.
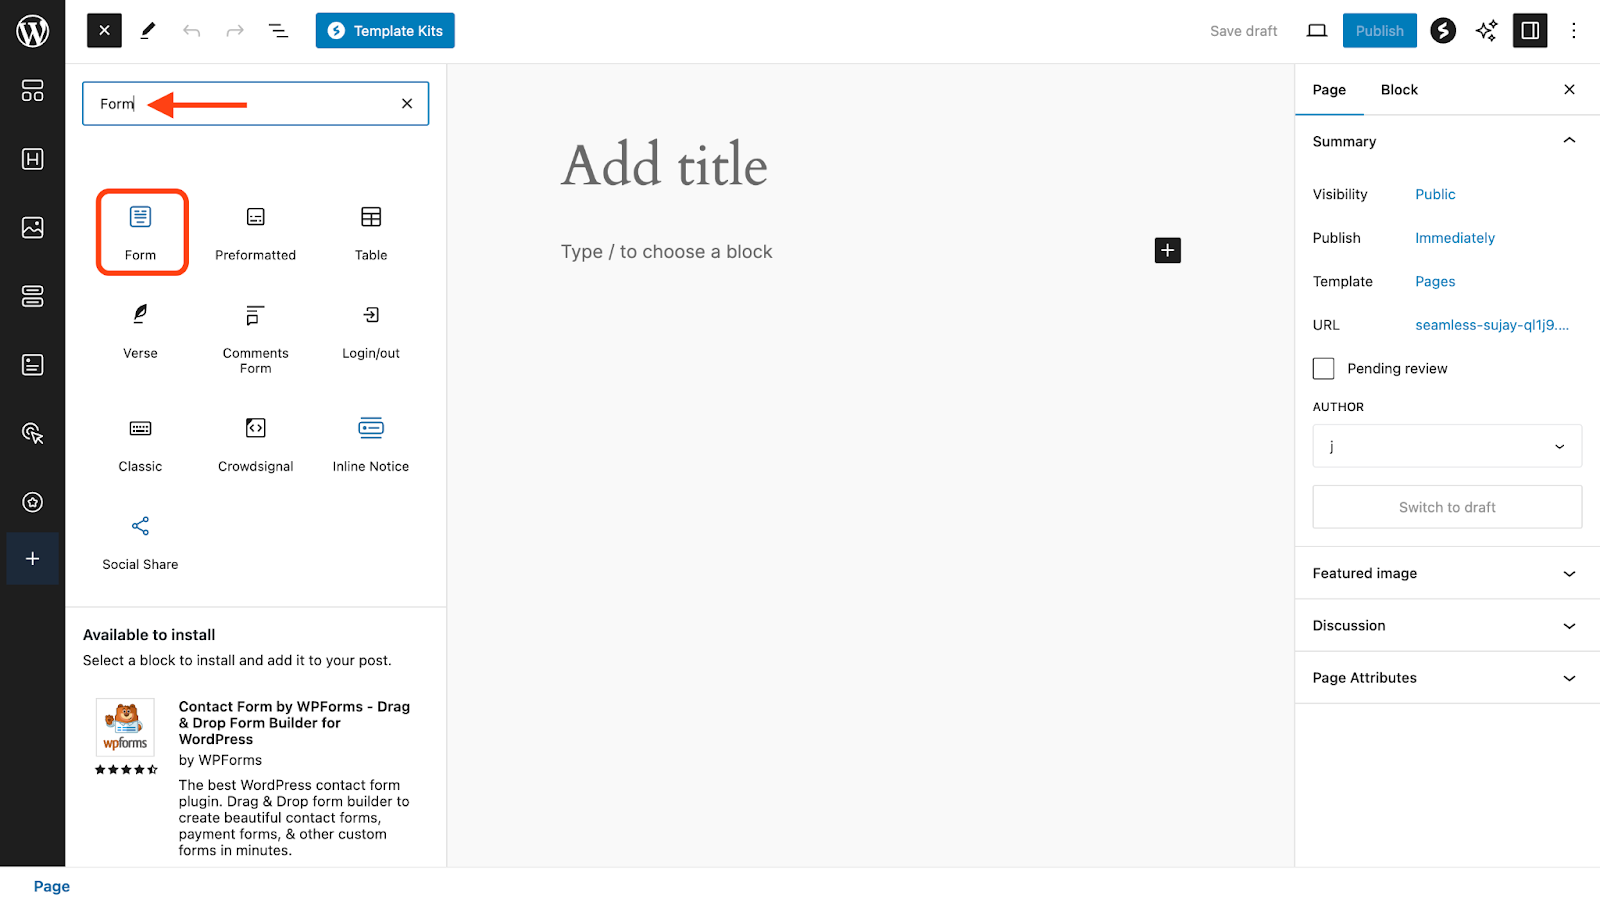
- Search for and select the Form block.
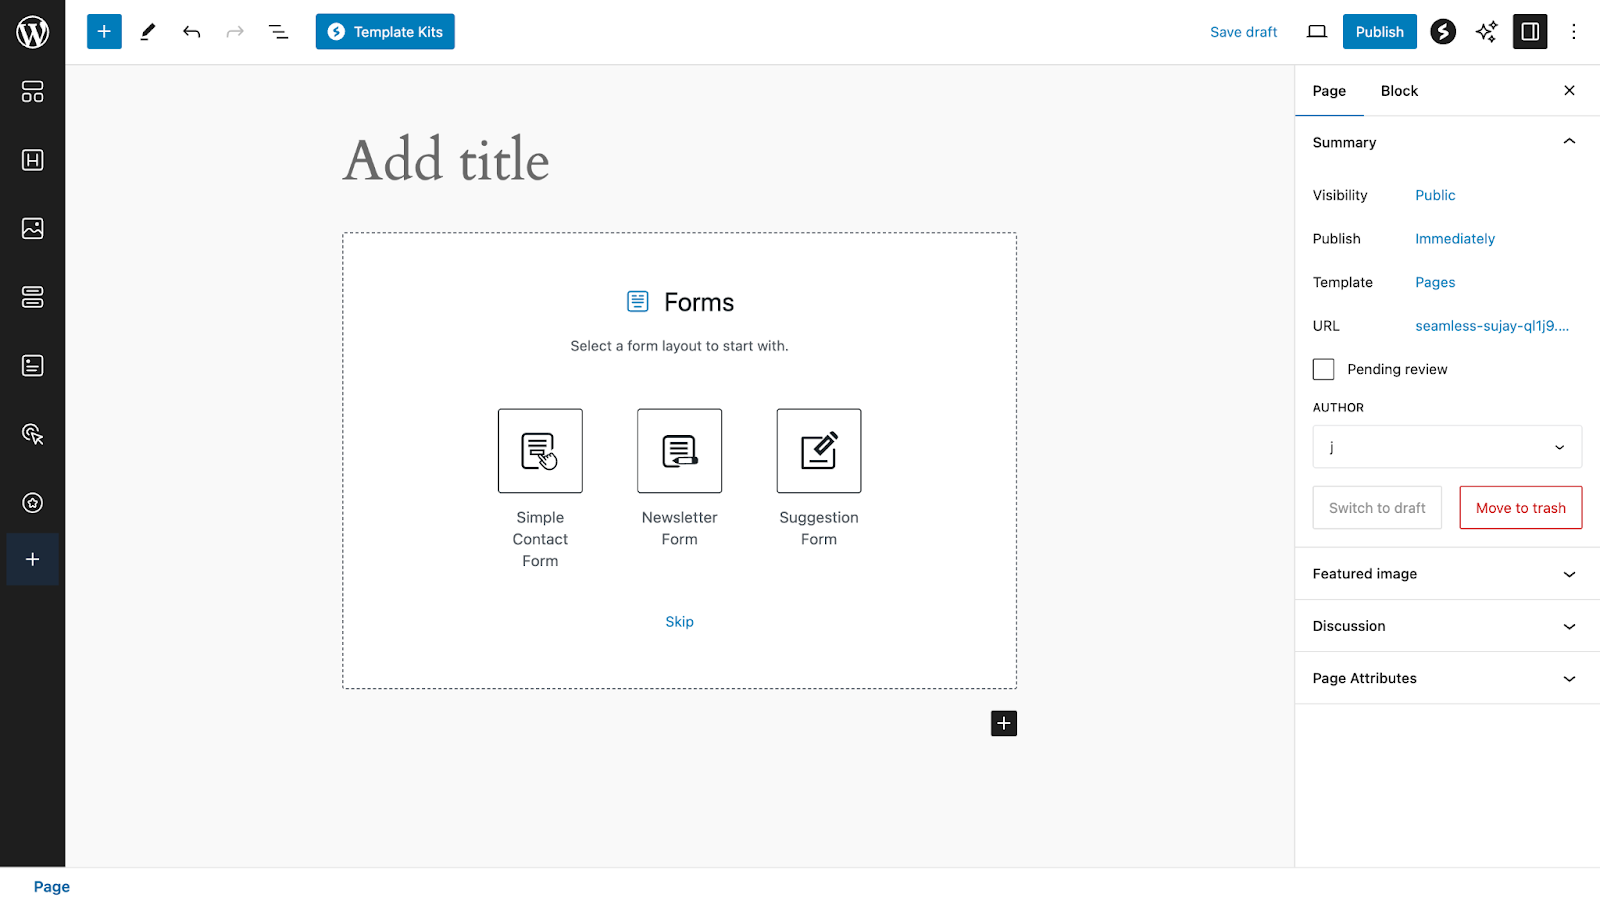
- Select the type of form template to start with. For this example, we’ll go with “Simple Contact Form”.
- Provide a form title.
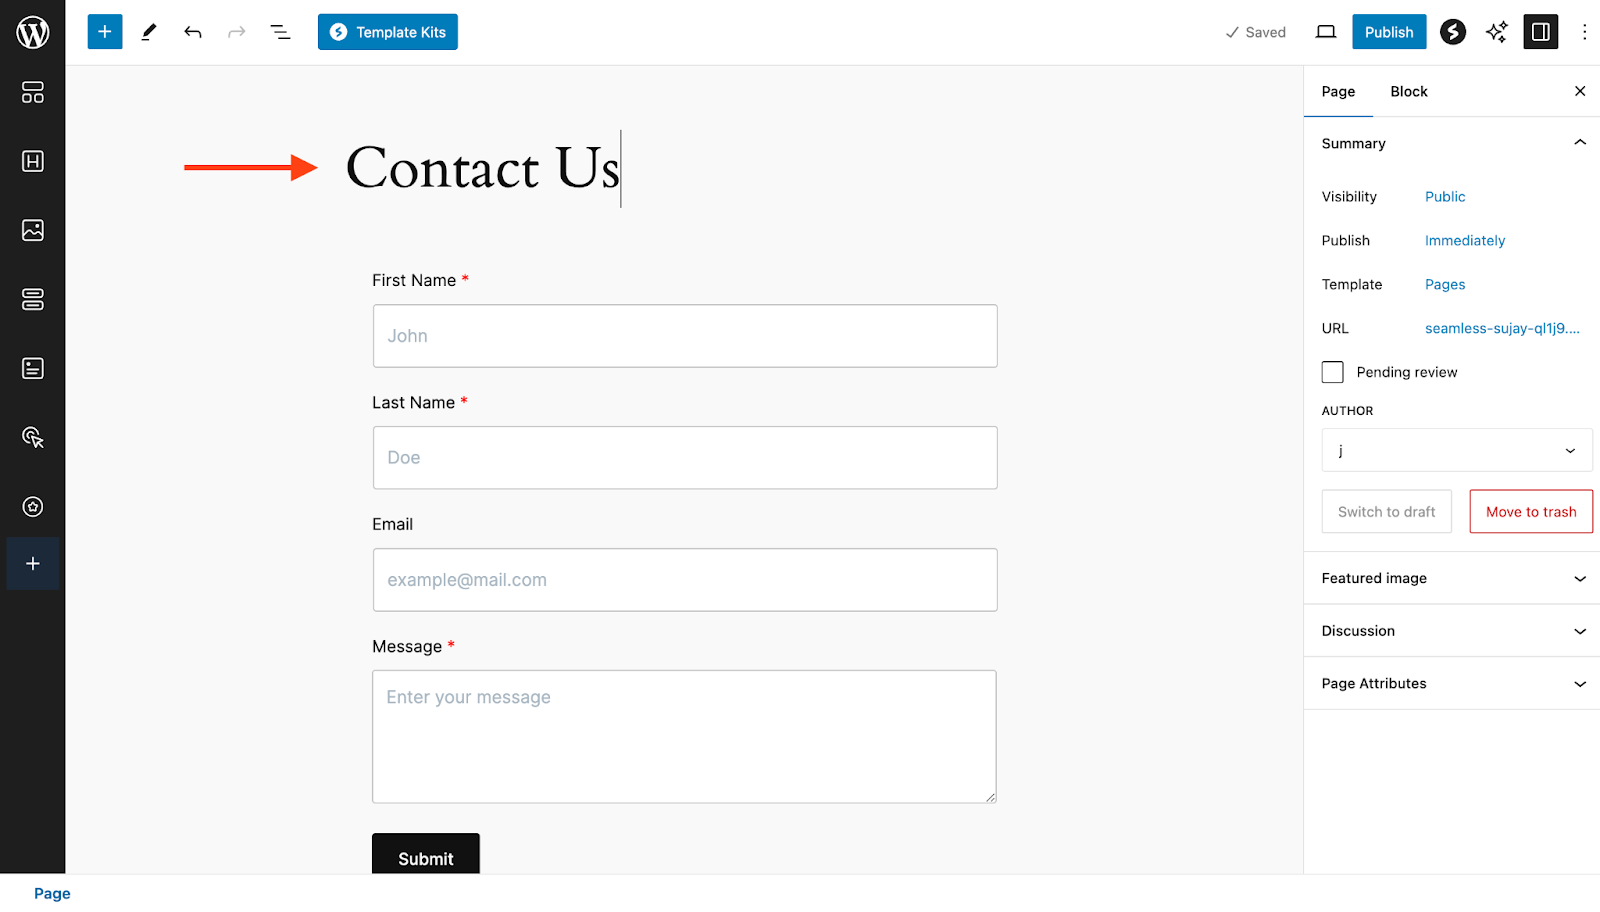
We have successfully created a form. Now, it’s time to add and configure the various form fields available with the Spectra Form block.
Adding & Configuring Spectra Form Fields
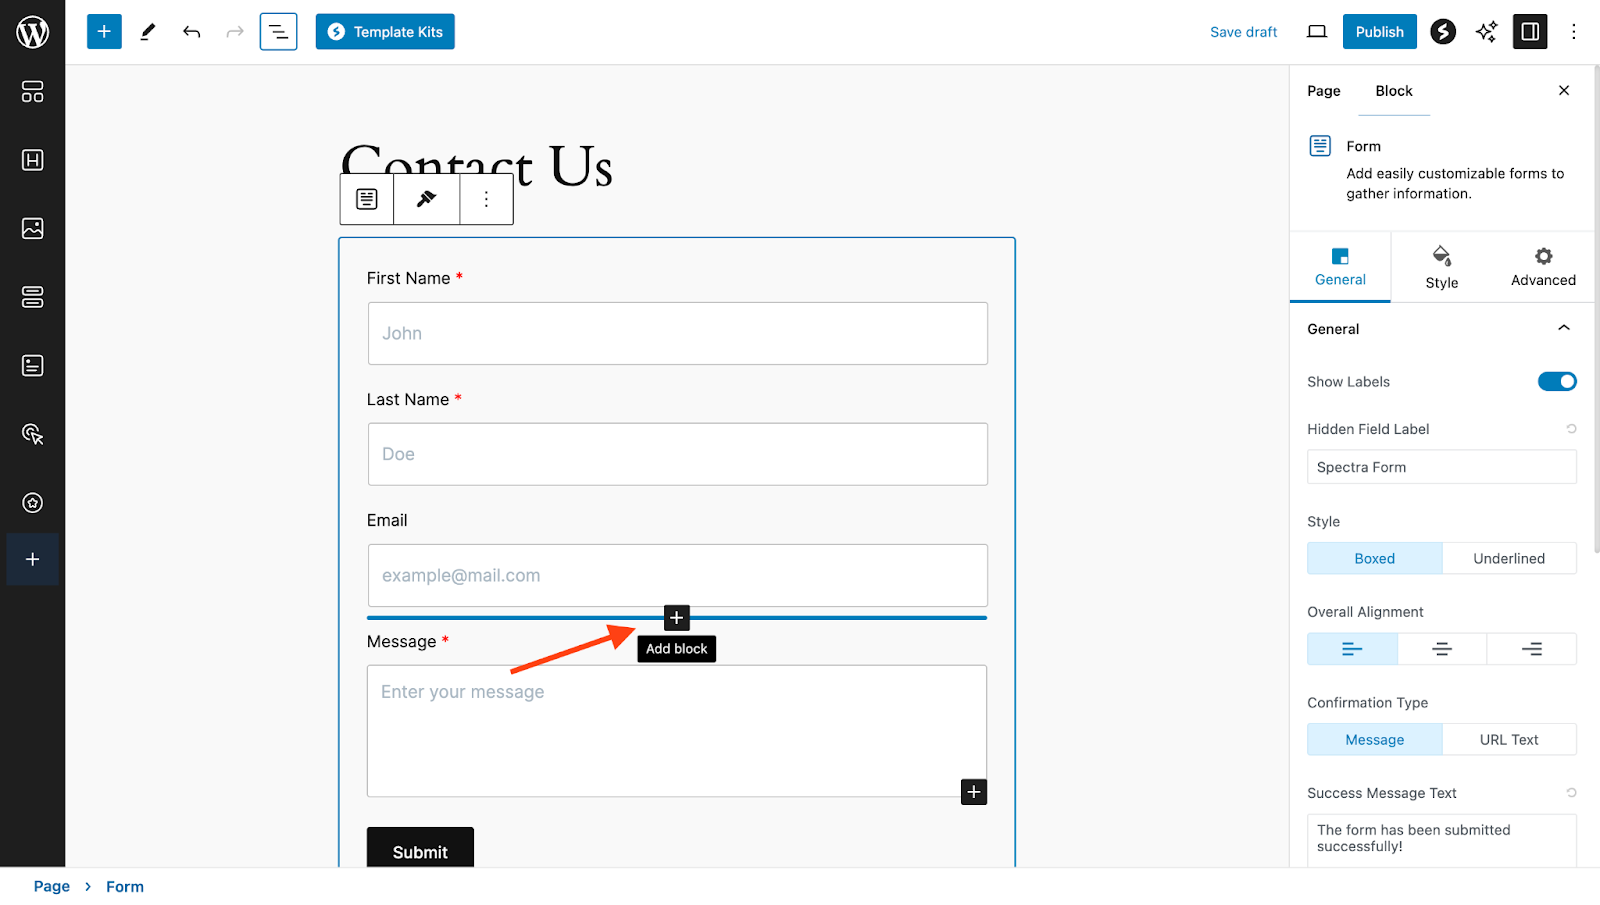
- Hover below an existing form field and click on the + icon to add a new field.
Some of the fields that you can add in your form:
- Name: Combines the user’s first and last names.
- Phone: Let users enter their phone numbers.
- Textarea: Offers users the ability to include longer messages. For instance, a “Feedback” field.
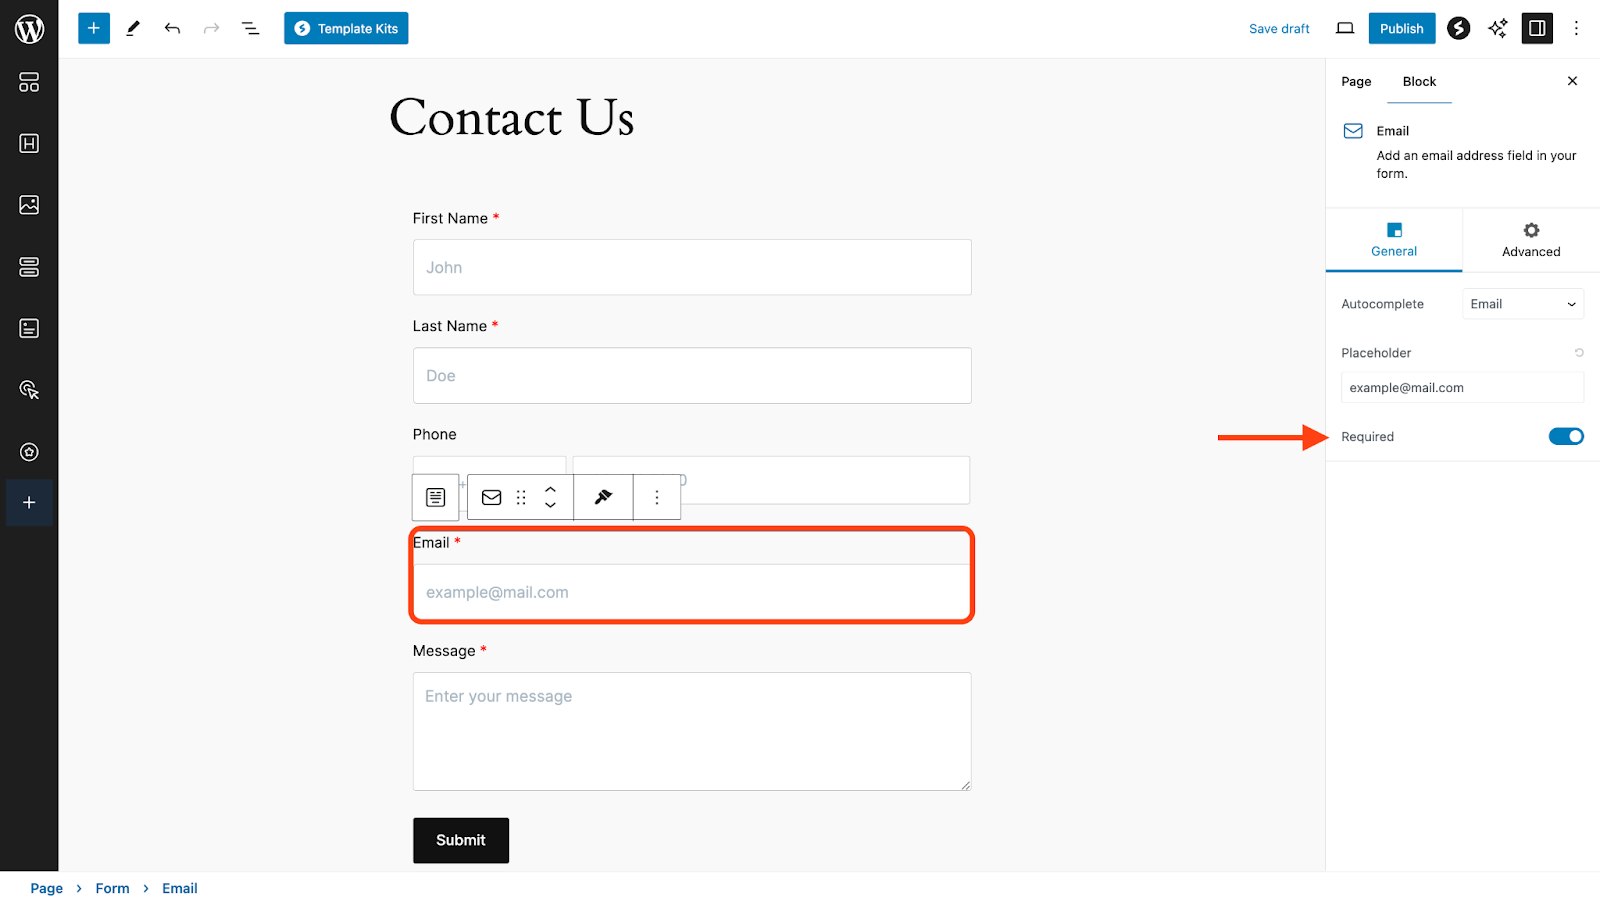
- Email: Allows users to input their email address.
- Checkbox: A simple option for users to check, such as a terms & conditions agreement.

- Drag and drop the following icon to arrange your form fields in the desired sequence.
- To make a field required, select the individual field, and enable the “required” option from the right panel.
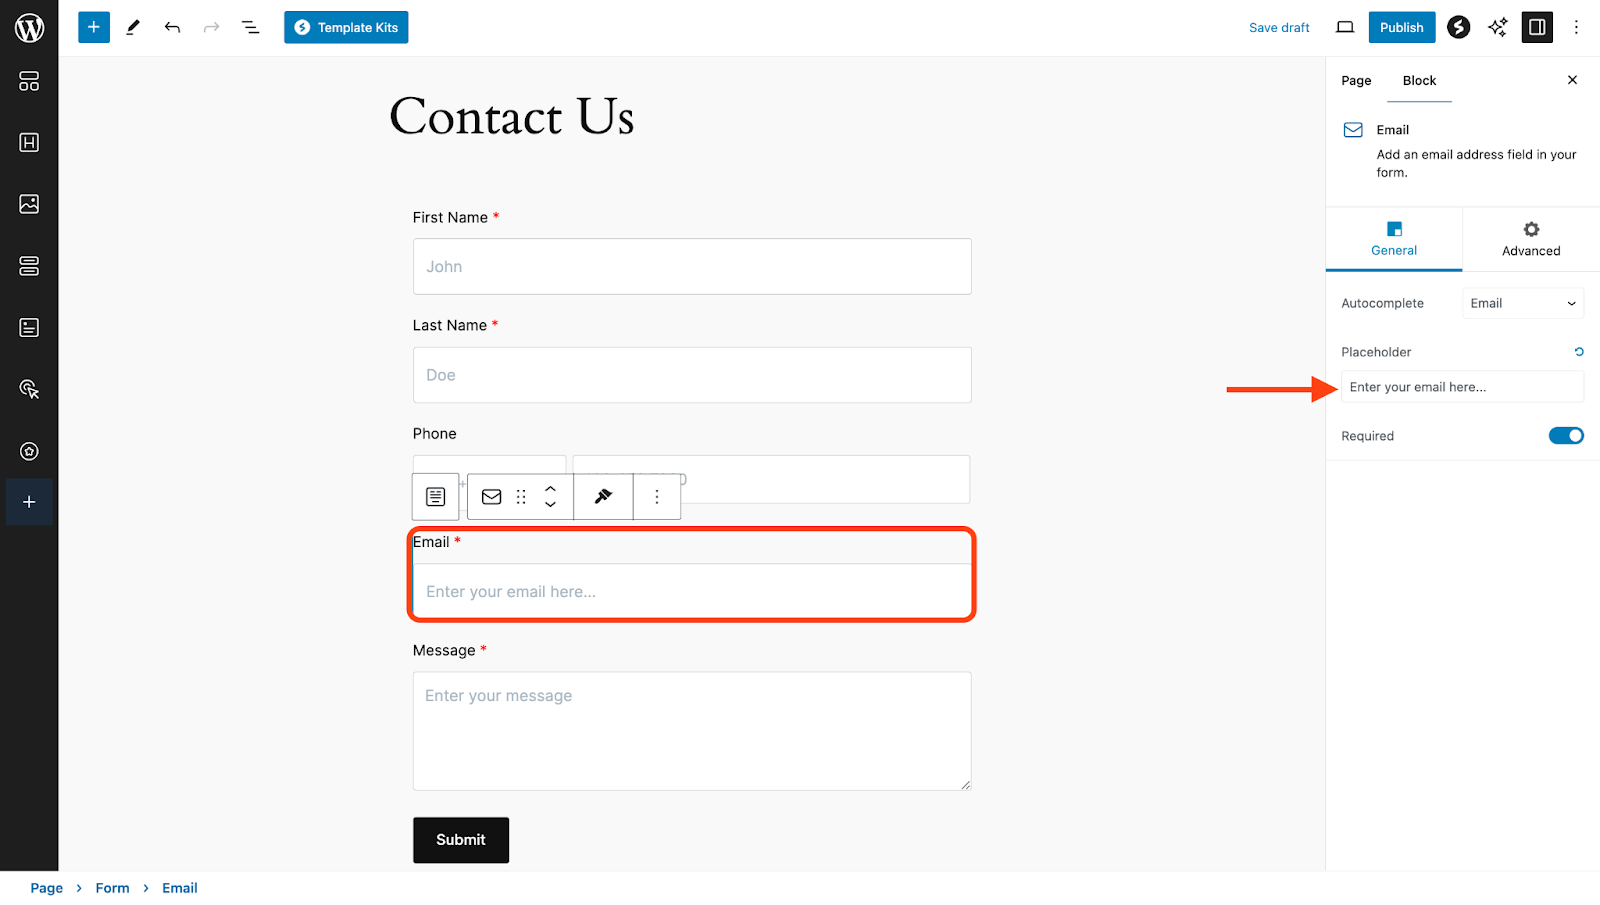
- Add placeholder text in a form field by editing this “Placeholder” textbox.
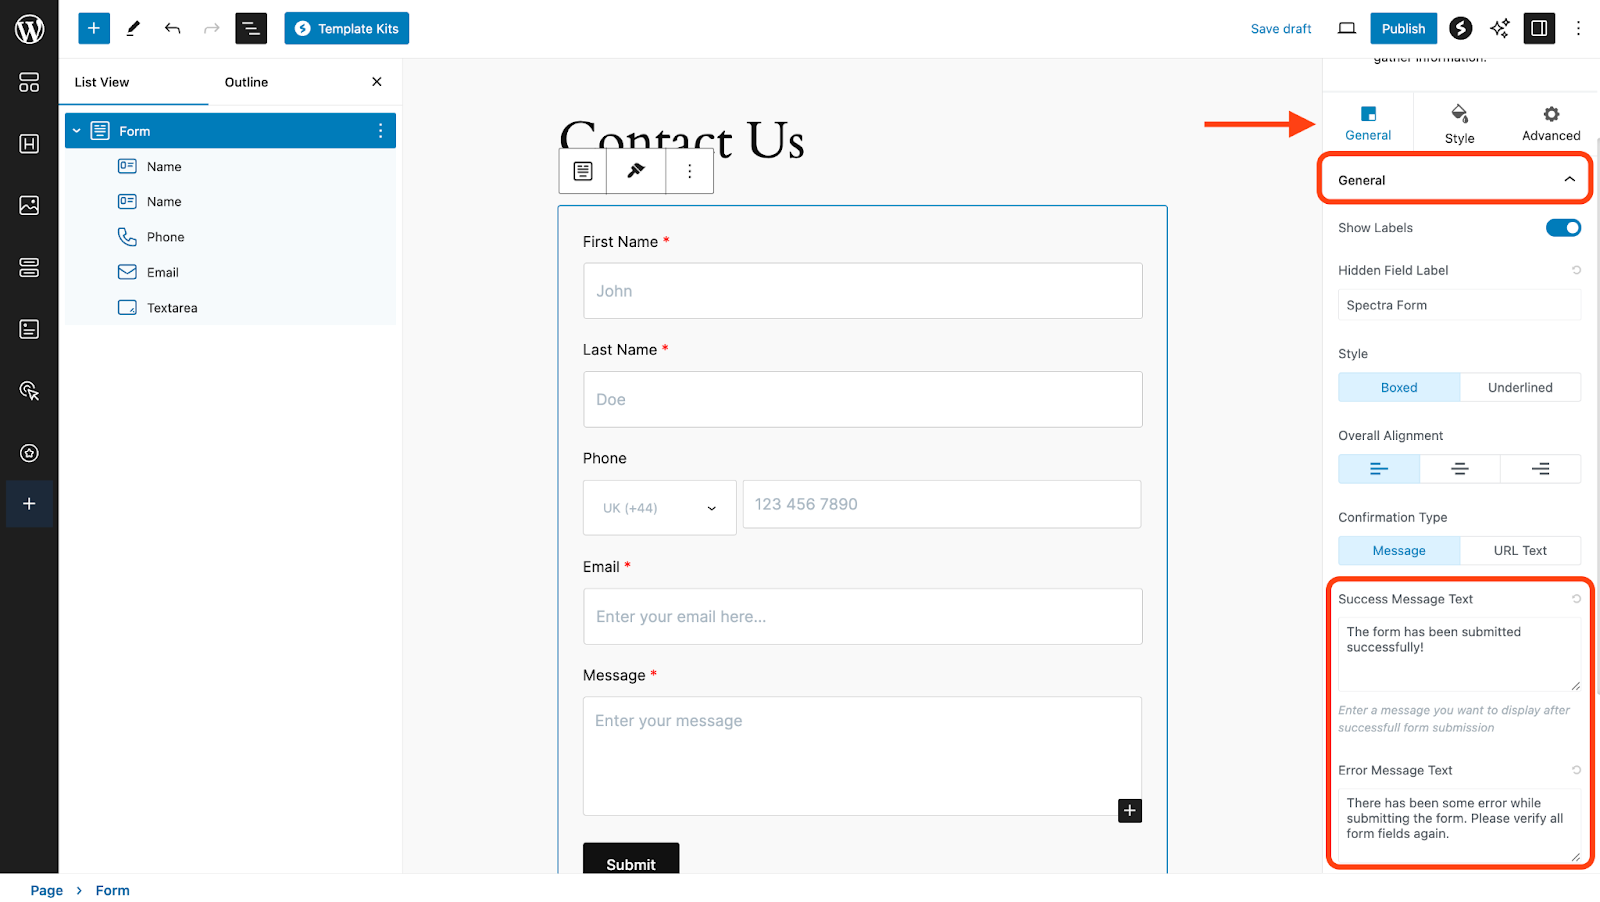
- Navigate to the General tab under General Settings to edit messages you want to display after form success or failure.
- Enable Google reCAPTCHA.
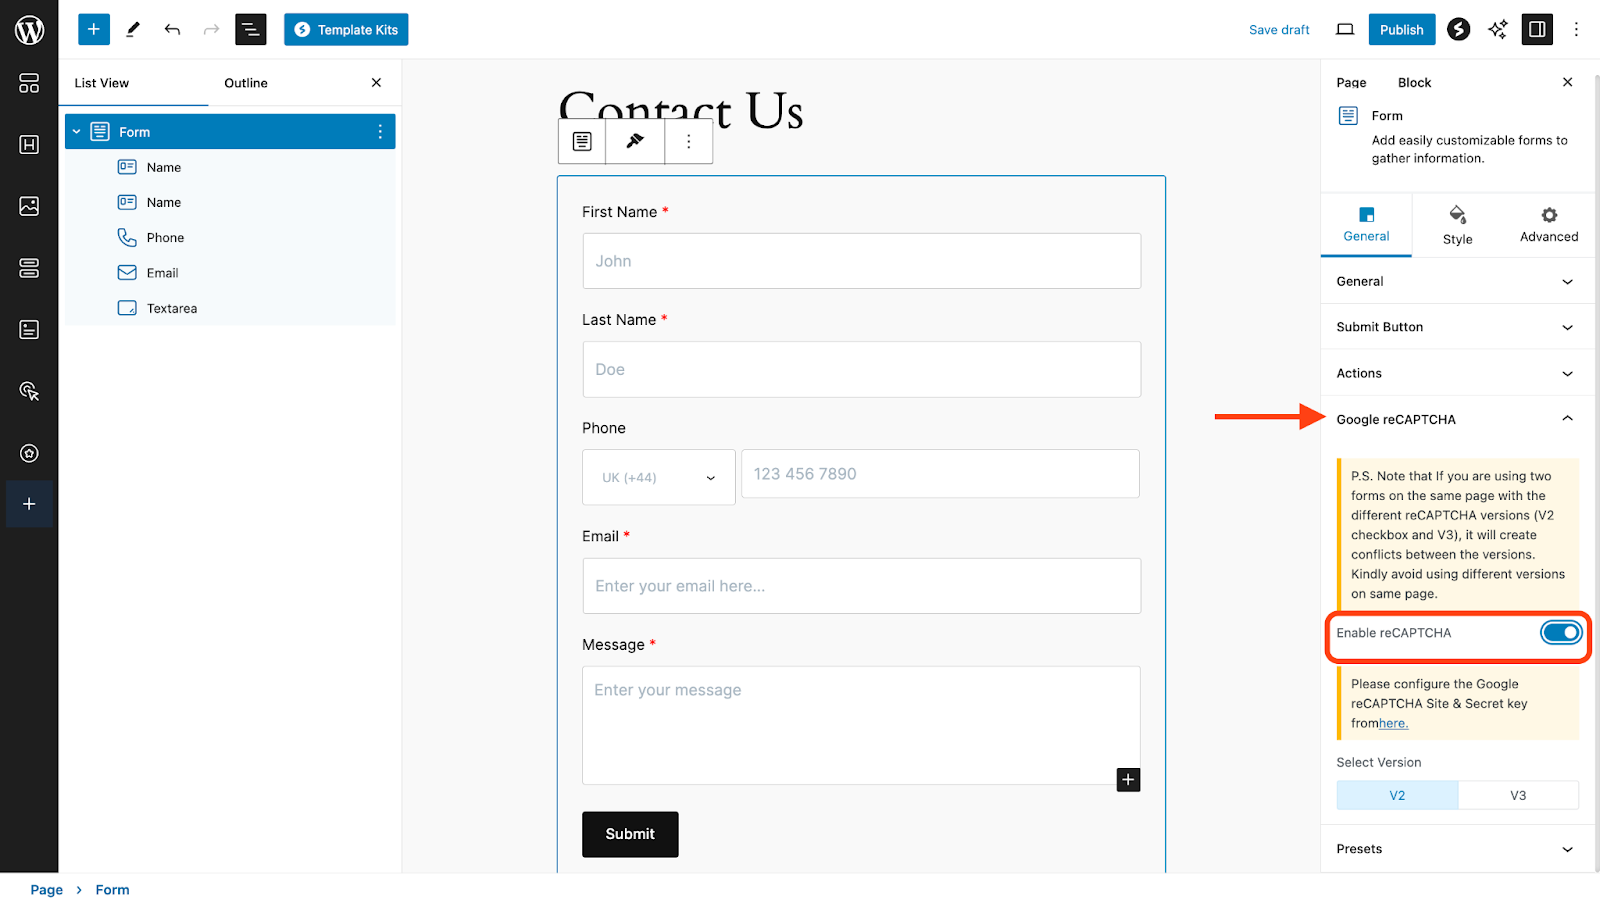
Note: Configure your preferred reCAPTCHA version and secret key at Spectra > Settings > Integrations in your WordPress admin.
Recording Form Submissions
After you’ve finished creating the form fields, the next step is to configure your form submission settings.
The submissions made by the users on your form can be sent to your email address. That way, you can easily access the user information right in your email box.
Note: To receive these form responses via email, you’ll need to configure the SMTP settings in your hosting service.
To do this:
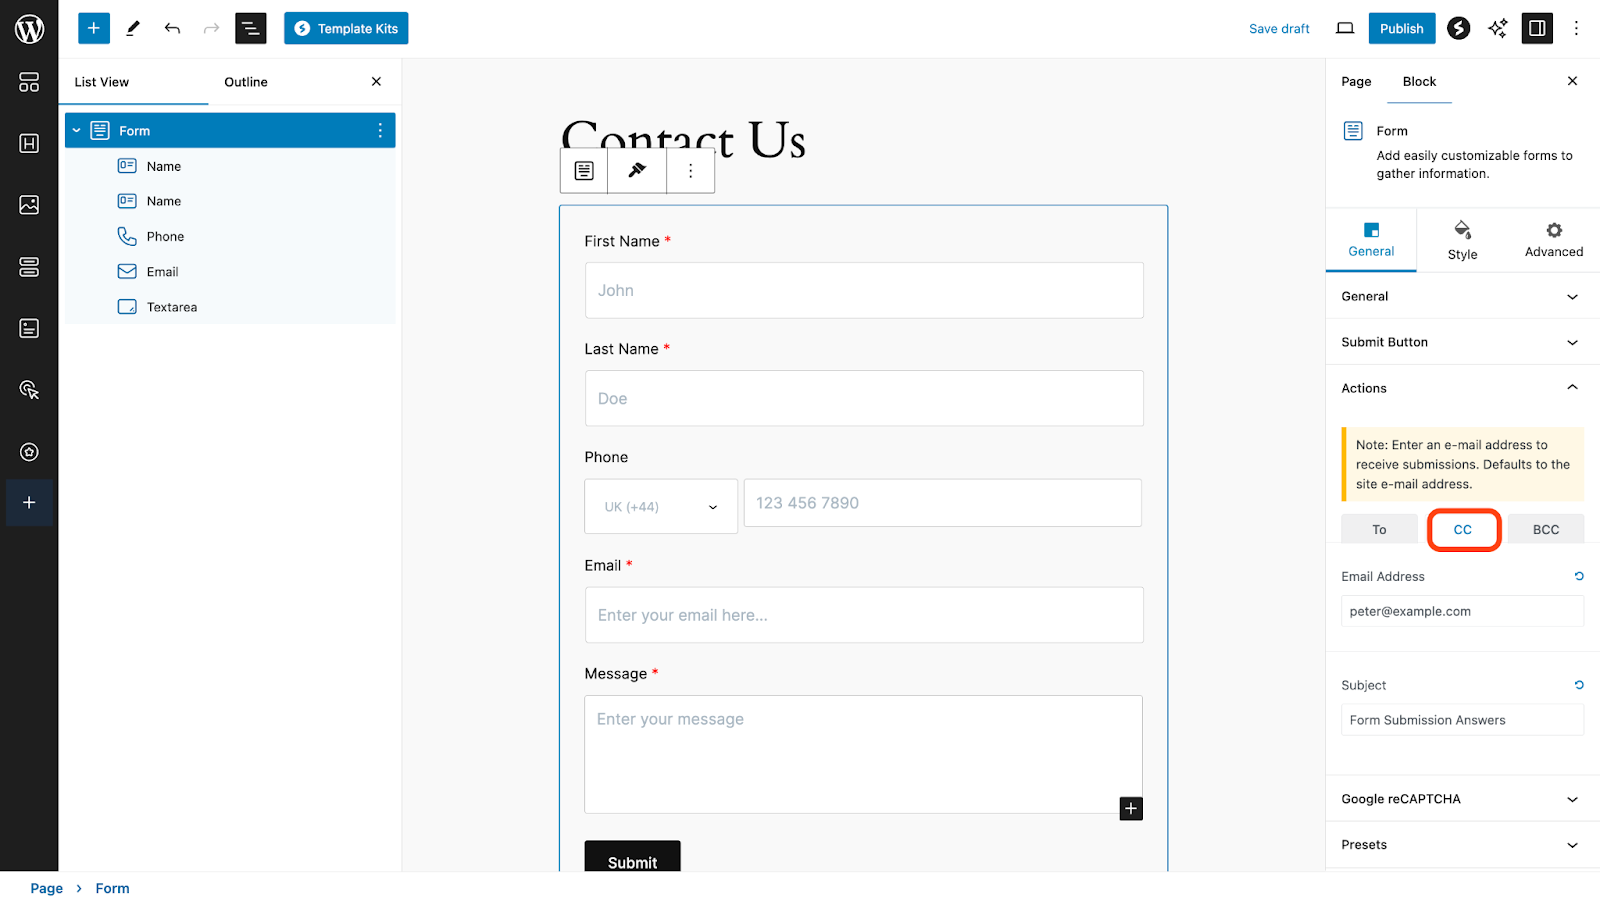
- Navigate to the Actions tab under General Settings.
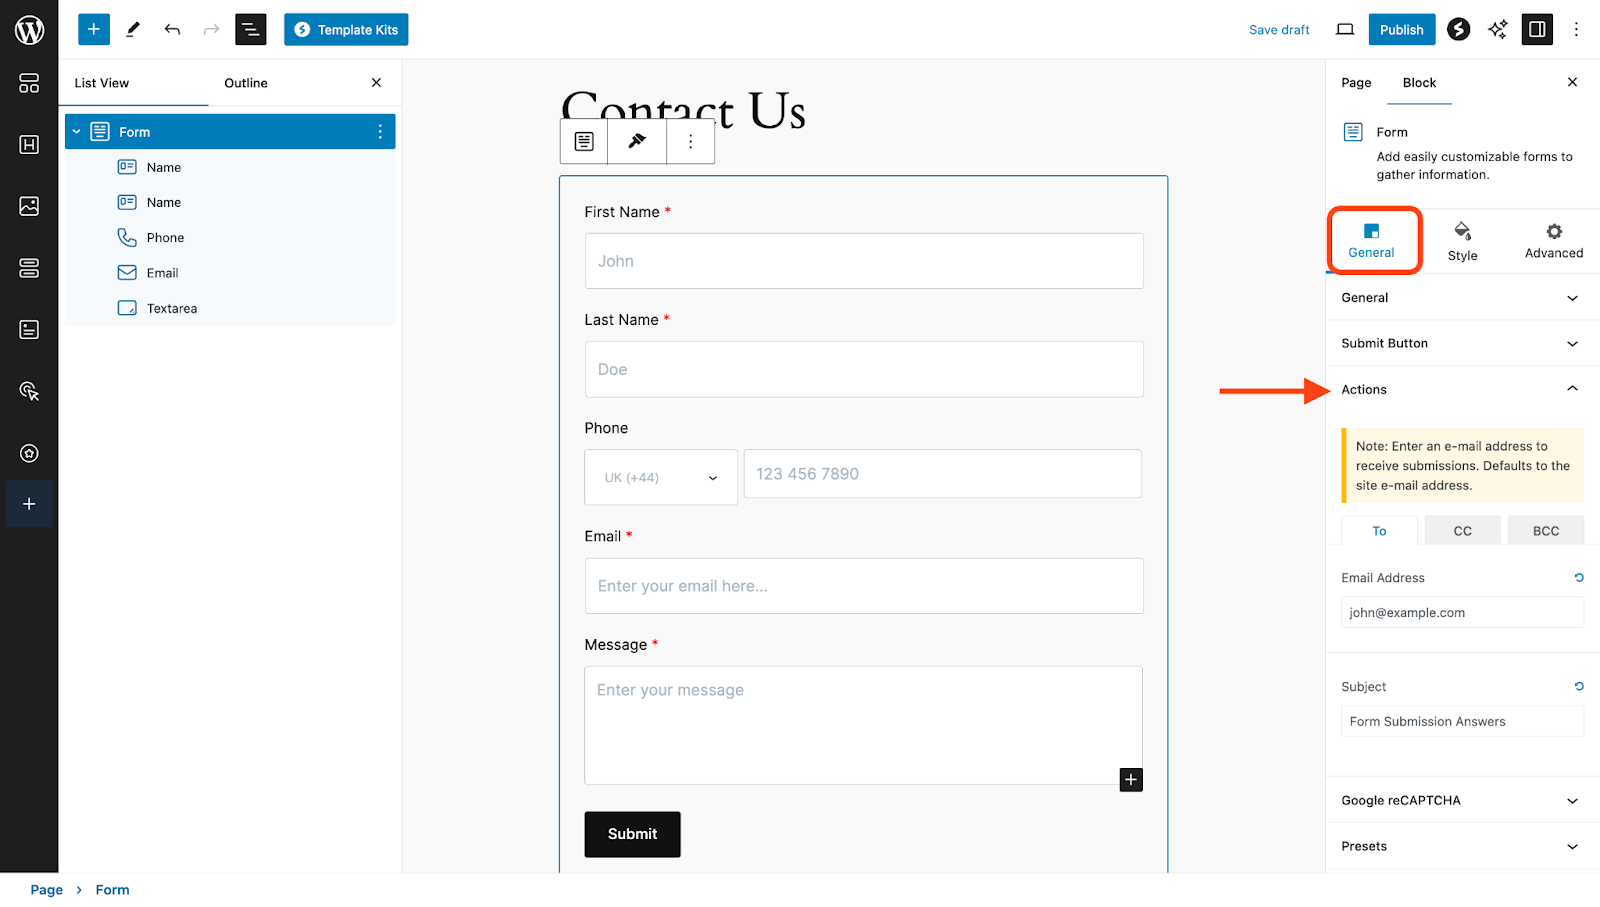
- Under “To”, enter the email address where you want the form submissions to be sent.
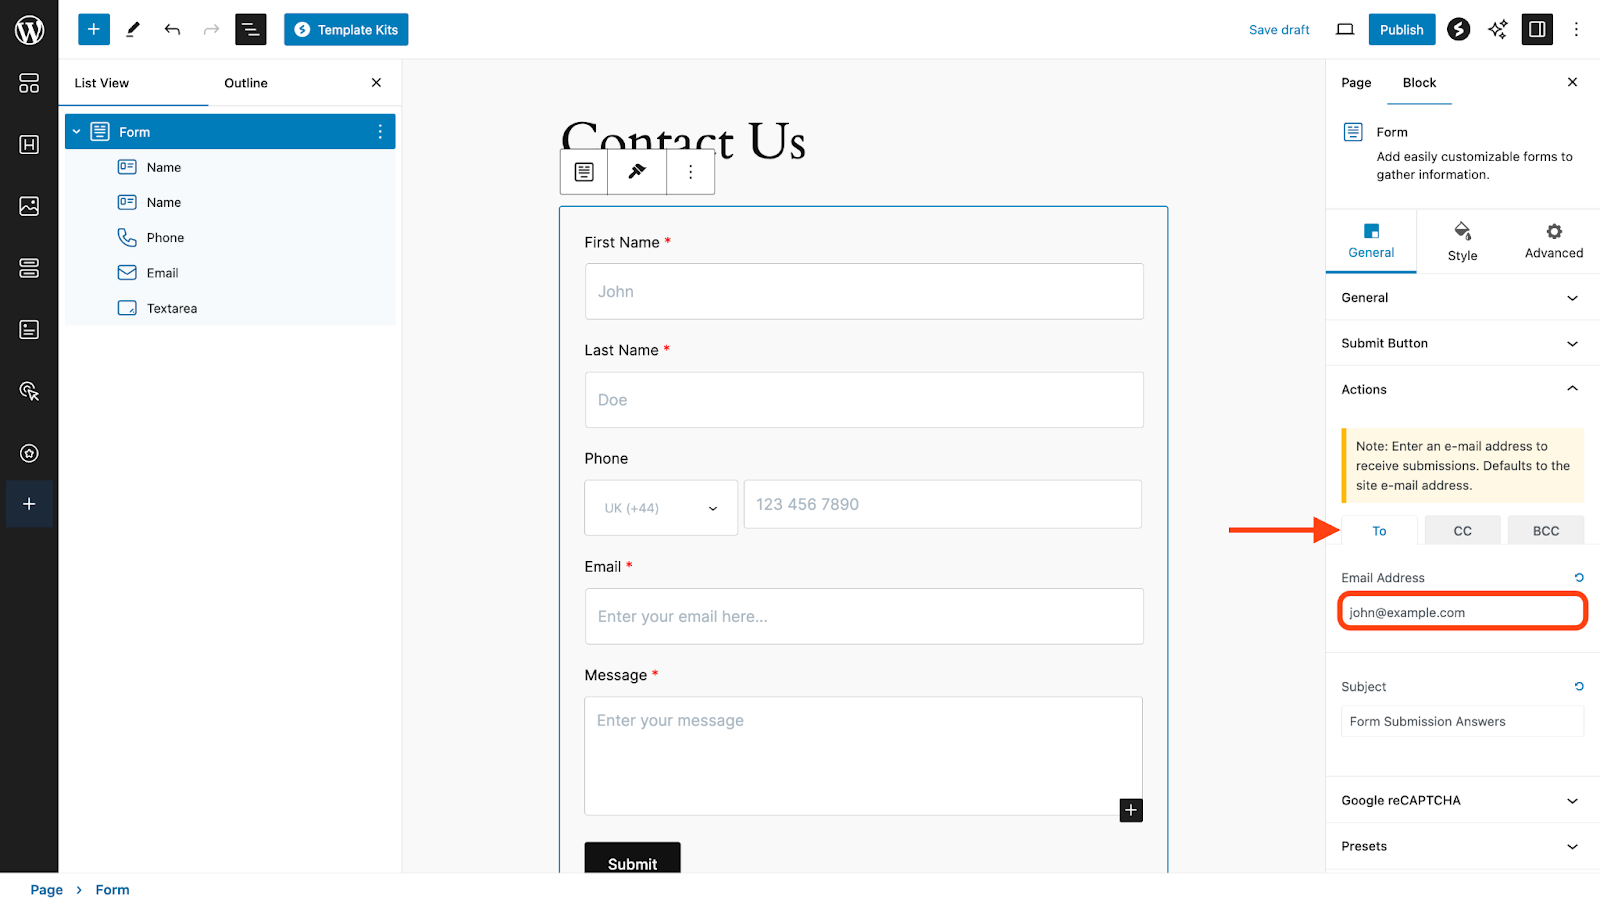
- Additionally, you can include “CC” and “BCC” email recipients as well as an email subject for form submissions.
Now, whenever a user fills and submits the form, the data will be sent to the email addresses configured here.
If form submissions are not being sent to your email address, please contact our support by opening a ticket below.
Styling Your Spectra Contact Form
Once you have the basic text and fields of your form taken care of, you can begin styling the design of your Spectra contact form.
For example, you may want to make sure that it matches your branding.
So you can click on the Style tab.
Here, you’ll find a wide variety of options and settings that you can use to customize the design of your contact form.
For instance, you can adjust the spacing and padding, as well as change the colors, size, labels, and buttons.

When you’re satisfied with the look and contents of your Spectra contact form, the only thing left to do is to save and publish it.
You can do so by selecting the Publish button at the top right side of the screen.
That’s it! You can preview your contact form on the front end to confirm that it looks as you want it to.

We hope this article has been helpful. If you have any questions, please feel free to leave a comment below.